Wireless Oral Dental Wifi Intraoral Camera Endoscope Borescope Led Light USB Camera Teeth Photo Shoot Dentist Intra Oral Camera

Location: Elephant-Road-Dhaka
Wireless Oral Dental Wifi Intraoral Camera Endoscope Borescope Led Light USB Camera Teeth Photo Shoot Dentist Intra Oral Camera
- It can bidirectionally take photos and videos in real time as well as clearly record each testing result.
- 720P high-definition image and quick transmission.
- Support: IOS /Android/ Windows System
- Wireless connection and transmission
- Focus on the problem of oral cavity and care for the health of your family.
Oral Dental USB WifiIntraoral Camera Endoscope Borescope Led Light Home USB Camera Teeth Photo Shoot Dentist Intra Oral Camera
Features
It can bidirectionally take photos and videos in real time as well as clearly record each testing result.
720P high-definition image and quick transmission.
Support: IOS /Android/ Windows System
Wireless connection and transmission
Focus on the problem of oral cavity and care for the health of your family.
Specifications
Pixel:1,000,000
Light: 6 LED lights(5600K)
Bright adjustment:5 levels of different brightness
Focus range:10-50mm
Field angel: 105°
Connection: Wifi
Terminal connection: 4 terminals at the same time.
Available distance: ≥30m
Battery: 3.7V 2100mA/h
Battery life: ≥3 hours / rechargeable
Product use:
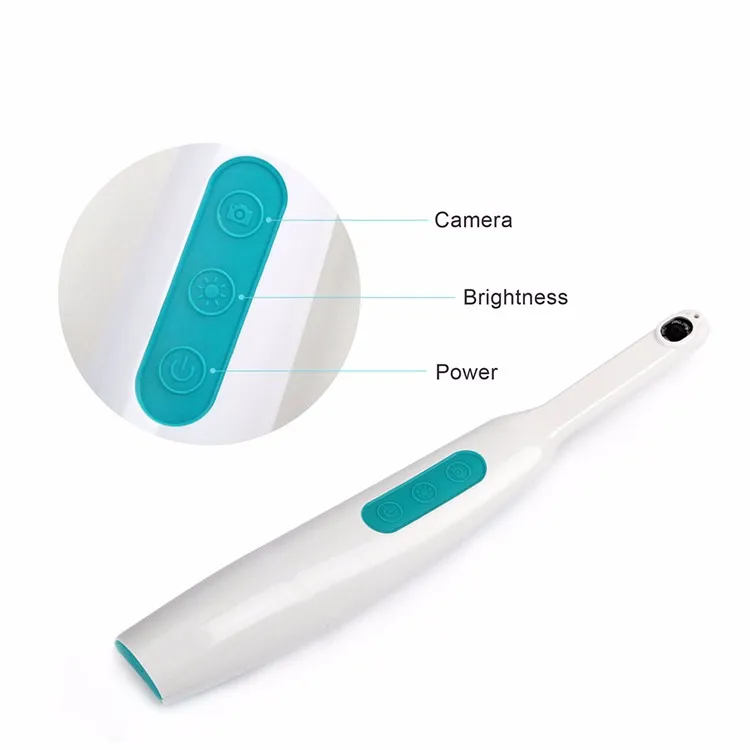
Keep pressing Power button for 3 seconds, green indicator lights up to start.
Turn on wifi mode on your phone or ipad, look for wifi named and connect it. After connection, turn on relative APP, it start working and the green light on Power button keeps flashing.
The middle button is for brightness adjusting of the camera.
Button is for taking photo or video. Short press for photo mode, blue light flashes once. Long press for video mode, blue light keeps flashing and it starts to record. Press the button again, the record will be auto-saved.
Different indicator light
Low Battery-red light on / Charging-orange light on/ Charge Complete-orange light off/ Instrument working-green light on/ Wifi Connection-green light keeps flashing/ Photo Mode-blue light flashes once/ Video Mode-blue light keeps flashing
Package Information:
Endoscopy host X1
Warm Tips
On condition that it keeps working for more than 20 minutes, the device will go hot on the surface. It is normal and safe to use.
Faults and Solutions
1.No image displaying;
Solution: Please check if wifi connection is correct, or the amount of terminal connection is more than 4. If normal, restart the device and connect it again.
2.The display image gets stuck;
Solution: Please check if battery is weak. If so, charge it, otherwise, restart the device and connect it again.
Note: this product also can be used in computer, you can download the install software by the below link. After installing this files, the computer will need to connect the WIFI of this product, then you can use it in the computer.
http://www.mediafire.com/file/o9paxc4j01eiaqq/camera-setup%E8%8B%B1%E6%96%87%E7%89%88.zip
Directions to use in the computer:
1. After installing the files and open it, you need to clink "Select Remote" to make a folder to store the pictures or the video.
2. When you want to take the photos or video, you can clink the "take pictures" or "start videos",please note that the button of the "take photo" in the product cannot work when using in the computer.
3. After the clink, you can find the pictures or video in the folder that you made in the step "1".


